Toilet Parts Repair in Fountain Valley, CA
Loose handle, snapped chain, weak flush or a tank part that gave out — one call connects you with a local toilet specialist who checks each part and replaces only what has worn out.
📞 Call Now — (714) 410-0362Small parts, clear symptoms
A toilet has a short list of working parts, and each one fails in its own way. Matching the symptom to the part is the first step, because the wrong swap wastes a visit and leaves the real fault in place.
Start with the handle. If you push the handle and nothing happens, the chain has likely slipped off the lever arm or snapped. If you have to hold the handle down for the whole flush, the flapper is dropping too soon, the chain is too long, or the water level in the tank sits too low. If you have to jiggle the handle to stop the toilet running, the flapper is not landing flat on its seat, and each jiggle reseats it by luck. That trick works for a while, then the rubber curls a little more and the jiggle stops working at all.
Listen next. A tank that refills on its own every few minutes, with no one touching the handle, points to a slow leak past the flapper. A hiss that never quite stops points to a fill valve that cannot fully close. A loud bang or whistle during the refill points to worn valve washers or high pressure moving through a tired valve body. None of these sounds fix themselves. Rubber parts harden with age and with the minerals in local water, metal arms corrode at the bend, and plastic levers grow brittle where they pass through the tank wall.
Look inside the tank with the lid set aside on a towel. The water line should sit about an inch below the overflow tube. A flapper should feel smooth and flat, not wavy or slimy at the edge. The chain should have a small amount of slack, about half an inch, and should hang straight so it cannot slip under the flapper when it drops. Tank bolts and the seal between the tank and the bowl should show no rust trails and no damp wood or tile below. If you see two or more of these faults at once, the tank set is aging as a group, and that shapes the repair plan.
- Handle feels loose, spins, or must be held down through the flush
- Chain slips off, kinks, or catches under the flapper
- Flapper looks curled, cracked, or leaves the tank refilling on its own
- Fill valve hisses, whistles, or never fully shuts off
- Flush tower sticks midway and the flush dies early
- Rust stains below the tank bolts or a damp patch under the tank
Many Fountain Valley homes were built in the 1960s and 1970s, and plenty still run tank parts that were swapped piecemeal over the years. A newer handle on an old lever arm, or a fresh flapper on a pitted flush valve seat, can work for a season and then fail again. A careful parts check looks at how the pieces work together, not just the one piece that broke this week. That is the difference between a repair that holds and a repair that brings the same symptom back next month.
From worn parts to a clean, full flush
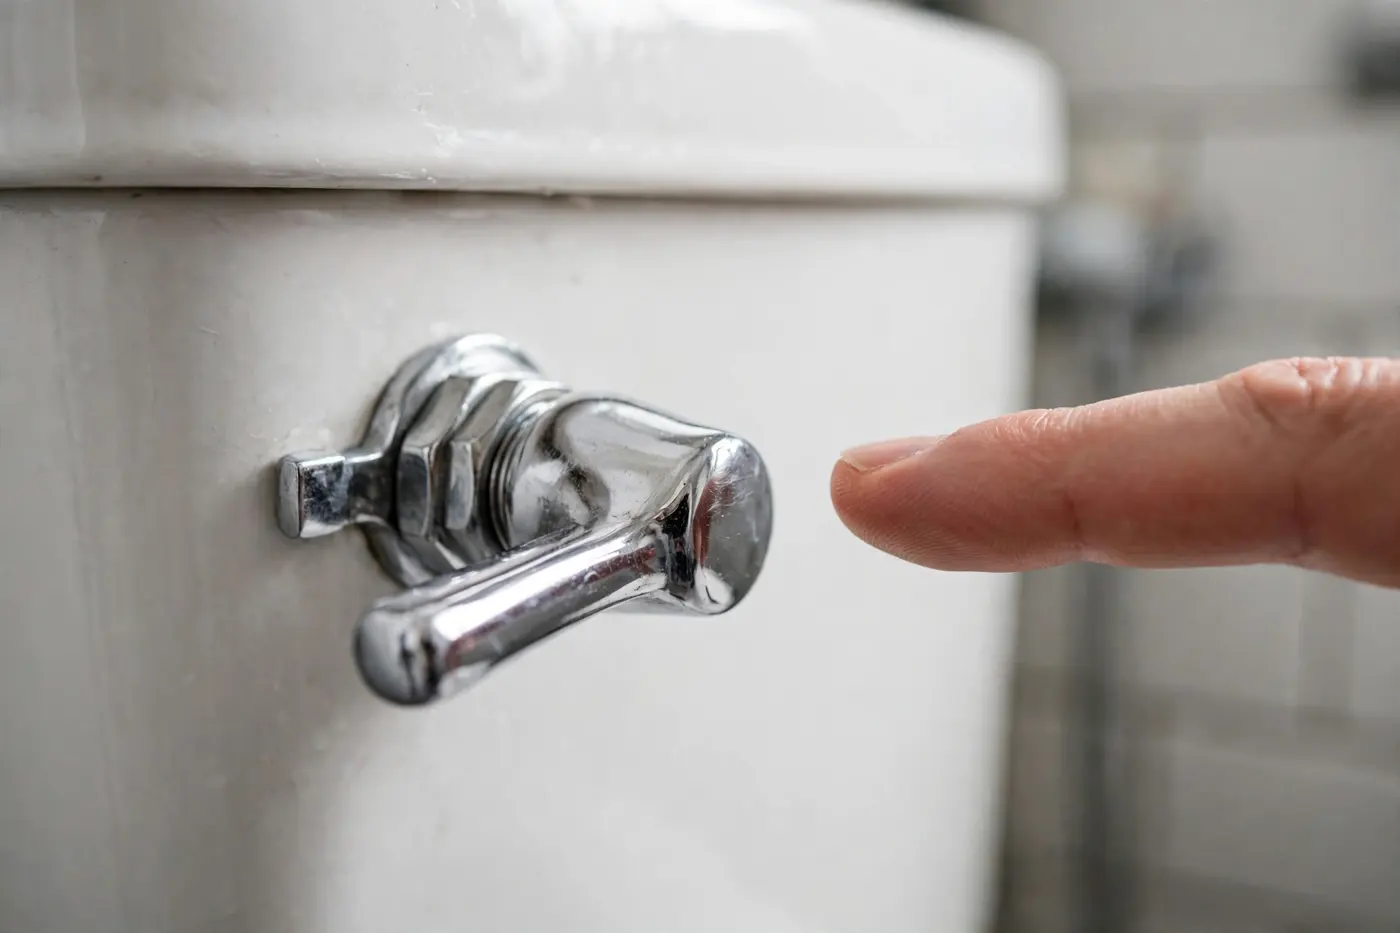
The handle wobbles in its hole, the lever arm is corroded at the bend, and the chain has stretched. Each flush needs a second push or a jiggle, and the flapper lands off-center, so the tank seeps and refills through the day.
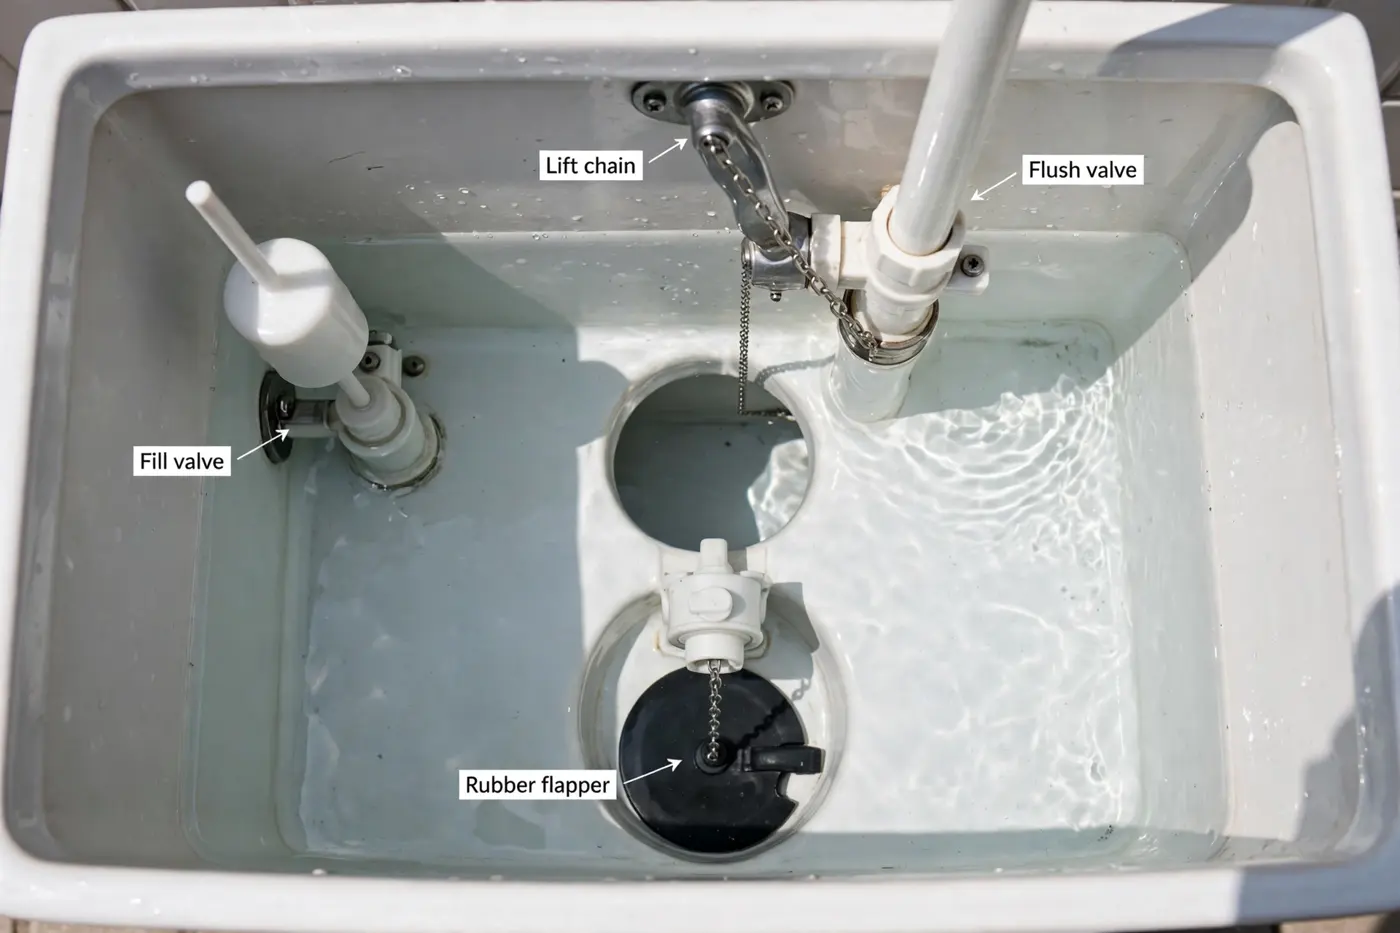
A fresh handle and lever sit firm in the tank wall, the chain is set with the right slack, and the flapper seals flat. The toilet flushes fully on one push, fills to the line, and then stays quiet until the next use.
The change you notice most is silence. A toilet with sound parts makes two short sounds: the flush, then the refill, then nothing. When a part is worn, the toilet adds extra sounds — a trickle, a hiss, a refill in the middle of the night. After a proper parts repair, the extra sounds stop, the handle feels solid again, and the flush strength returns because the flapper now lifts fully and drops straight. Guests stop asking how to work your bathroom, and the water meter stops creeping between uses.
How a parts repair visit runs, step by step
The work follows a set order so nothing gets swapped on a guess. Each step ends with a test, and the next step only starts when the test shows it is needed.
Flush test and tank inspection
The technician flushes the toilet several times and watches the full cycle: lever lift, flapper rise, bowl clear, refill, and shut-off. Then the lid comes off and each part gets a hands-on check — lever bend, chain links, flapper edge, valve movement, bolt condition, and the water line against the mark inside the tank.
Findings explained before any swap
You hear which parts failed, which parts are worn but working, and which parts are sound. The technician explains what each swap involves and confirms the scope with you before any work starts. Nothing is fitted first and explained later.
Water shut off and tank drained as needed
For handle and chain work, the water can often stay on. For flapper, valve, or bolt work, the shut-off valve behind the toilet is closed, the toilet is flushed to drain the tank, and the last water is sponged out so the work area stays dry and clean.
Worn parts removed and new parts fitted
The failed part comes out and the replacement goes in: handle and lever through the tank wall with the nut snug but not forced, chain clipped at the right length, flapper seated on its pegs, or a valve set to the right height. Old rubber and corroded metal leave with the technician.
Water level and chain slack set
Small settings decide how the toilet behaves for years. The water level is set to the line, the chain gets its half inch of slack, and the lever arm is angled so the flapper lifts straight up instead of tipping to one side.
Repeat flush tests before the lid goes back
The toilet is flushed again and again while the technician watches the seal, the refill, and the shut-off. A dye check can confirm the flapper holds. Only when the cycle runs clean three times in a row does the lid go back on and the visit wrap up.
If the check shows the problem sits deeper — a pitted flush valve seat, a cracked tank, or a leak at the base — you will hear that plainly, with the options laid out. Sometimes the right call is a wider job such as fill valve and flapper replacement across the whole tank set, or toilet leak repair when water is reaching the floor. The parts visit still earns its keep, because now the decision rests on tested facts instead of a guess over the phone.
Checks you can do before you call
A few parts faults are simple to confirm at home, and one or two can be settled on the spot. Work through these checks in order, and stop where the notes tell you to stop.
First, lift the tank lid and set it on a towel. Push the handle and watch the chain. If the chain has slipped off the lever or the flapper clip, hook it back on and leave about half an inch of slack. Flush twice. If the toilet now flushes and seals, the fault was the chain alone. Second, check the chain length. A chain that is too long can slide under the flapper and hold it open, which makes the toilet run. A chain that is too short holds the flapper slightly open all the time. Either way, moving the clip a few links along can settle it.
Third, press the flapper down gently with a gloved hand or the end of a brush handle and hold it there while someone flushes. If the running stops and starts again when you let go, the flapper edge is no longer sealing. Cleaning grit from the seat under the flapper sometimes helps for a short while. Fourth, check the handle nut inside the tank. It turns the opposite way from most nuts, and a quarter turn by hand can take the wobble out of a loose handle. Do not force it with a wrench; the nut and the tank wall can crack.
Stop point: stop and call if the shut-off valve behind the toilet will not turn, if tank bolts are rusted through, if you see a crack in the porcelain, or if water appears on the floor around the base. Forcing a stuck valve or a rusted bolt can turn a small parts job into a floor and supply job. Turn the water off at the valve if it moves easily, and call (714) 410-0362 during open hours.
Many homeowners in Green Valley, Park Crest, and the tracts around Mile Square Park settle chain and handle faults with the checks above. When the fault turns out to be a worn valve, a pitted seat, or bolts that crumble at a touch, that is the point where a specialist visit saves time and protects the floor and the supply fittings.
Handles and trip levers: the parts you touch every day
The handle and trip lever do more work than any other part of the toilet. Every flush starts there. You push the handle, the handle turns a lever arm inside the tank, the arm lifts the chain, and the chain lifts the flapper or the flush tower. When any link in that chain of parts wears, the flush weakens, sticks, or fails, even though the valves and the bowl are perfectly sound. Because the handle sits outside the tank and the lever works inside it, the two age at different speeds, which is why handle trouble deserves its own careful look.
Front-mount handles are the common style in Fountain Valley homes: the handle sits on the front face of the tank, near one corner, and the lever arm reaches across the tank to the chain. Side-mount handles sit on the side wall of the tank and are common on corner tanks and some older one-piece toilets. The mounting hole, the nut thread, and the arm length all differ between styles, so a handle is never a blind swap. The technician matches the mount, the arm reach, and the chain angle to your tank, then checks that the arm clears the fill valve and the overflow tube through the whole swing.
What wears out on a handle and lever
The nut that holds the handle to the tank wall loosens a little with every push, because the push twists the handle in the same direction each time. Once the nut backs off, the handle wobbles, the wobble wears the square hole in the tank wall rest, and the lever starts to sit at an angle. An angled lever lifts the flapper unevenly. The flapper then lands unevenly, and a toilet that only needed a snug nut slowly becomes a toilet that runs. Metal lever arms also corrode where they bend, right at the water line inside the tank. The bend is the hardest-worked point and the wettest point, so it thins first. A thinned arm flexes under load, steals lift from the flapper, and one day snaps mid-flush.
Plastic levers fail in a different way. The arm grows brittle with age and can crack where it passes through the tank wall. The first sign is often a handle that feels springy or soft instead of firm. Push-button and dual-flush tops replace the lever with rods or cables that press a flush tower. Those rods can slip out of adjustment, so one button gives a weak flush and the other gives none. Each style has its own fix, and each fix starts with naming the style correctly.
Chains, lift wires, and flush towers
Between the lever and the flapper sits the link: a bead chain on most tanks, a lift wire on some older ones, and a direct tower connection on newer flush designs. Chain faults are the single most common handle-cluster fault. A chain can slip off its clip, kink and shorten itself, rust at one link until it parts, or hang so long that it slides beneath the flapper and props it open. Lift wires bend out of shape until the flapper rises crooked. Flush towers can stick on their guide rails when mineral grit builds up, so the tower stays raised a fraction too long or drops back crooked and seeps.
Setting a chain looks simple and is easy to get slightly wrong. Too much slack and the chain can tangle or slip under the flapper. Too little slack and the flapper never fully seats, so the tank seeps all day in silence. The right setting — about half an inch of slack with the flapper closed — lets the flapper lift straight, clear the seat fully during the flush, and drop straight back onto the seat when the tank empties. After any chain work, the technician watches several full flushes, because a chain fault often shows only on the third or fourth cycle.
If your handle trouble comes with a running tank, pair this page with our guide on how to replace a toilet flapper, and know that a full running toilet repair visit covers the same ground when the cause sits lower in the tank. Handle-cluster work also pairs naturally with a toilet seat replacement when the whole bathroom needs a refresh in one visit. For coverage across the city, see areas we serve.
Toilet parts repair questions from Fountain Valley homes
What parts are covered by toilet parts repair?
Toilet parts repair covers the working parts inside and on the tank: the handle and trip lever, the lift chain or lift wire, the flapper, the fill valve, the flush tower on newer tanks, tank bolts, and the small seals between the tank and the bowl. The technician checks each part in turn, tests the flush, and replaces only the parts that have worn out or broken. The scope is confirmed with you before any work starts.
How does a technician start a toilet parts repair visit?
A toilet parts repair visit starts with a full flush test and a look inside the tank. The technician checks the handle movement, the chain slack, the flapper seal, and the water level, then watches two or three full flushes to see which part fails under normal use. Parts that still work well are left in place. You hear what was found before any part is swapped.
Can toilet parts repair fix a handle that needs jiggling?
Yes. A handle that needs jiggling during toilet parts repair work usually points to a loose handle nut, a worn trip lever arm, or a chain with too much slack. The technician tightens or replaces the handle, sets the chain length so the flapper lifts cleanly and then seals flat, and tests the flush several times. If the tank lever hole is worn, a fresh handle body solves the wobble.
How long does toilet parts repair take in most homes?
Most toilet parts repair jobs are finished in a single visit because handles, chains, flappers, and valves are standard parts the technician can fit on the spot. The visit includes draining or lowering the tank water when needed, fitting the new part, and running repeat flush tests. Older tanks with rusted bolts can take longer, and the technician will explain that before starting that part of the work.
Should I replace one part or several during toilet parts repair?
During toilet parts repair, the technician looks at the age of the whole tank set, not just the broken piece. If the handle failed and the flapper is also curled and leaking, fitting both in one visit saves a second call later. If the other parts are firm and sealing well, there is no need to change them. You decide after hearing the condition of each part.
Does toilet parts repair help if the toilet runs after flushing?
Yes. Running after a flush is a common reason for toilet parts repair. The cause is often a flapper that no longer seals, a chain that holds the flapper open, or a fill valve that does not shut off at the right level. The technician tests each one, replaces the worn part, and stays to confirm the tank fills, stops, and stays quiet. If the problem sits in the flush valve seat, that is explained on the spot.
A toilet part gave out? Let us check it today.
Call during open hours — Mon–Fri 7:00 AM–10:00 PM, Sat 8:00 AM–10:00 PM, Sun 7:00 AM–9:00 PM — and one call connects you with a local toilet specialist for Fountain Valley.
📞 Call Now — (714) 410-0362 Prefer email? [email protected]